
Remember that initial intimidation when you first unboxed your food processor? I certainly do. All those blades and buttons can feel overwhelming, like you’ve just brought a small, powerful, and slightly mysterious robot into your kitchen. I recall staring at mine, still in its pristine packaging, wondering if I’d truly unlock its potential or if it would just gather dust next to my rarely-used juicer. But I’m here to tell you that fear is completely normal, and it’s also completely unfounded! As someone who’s spent over a decade chopping, puréeing, shredding, and kneading with these fantastic machines, I’m going to show you just how easy and versatile it can be to get started with basic functions, transforming that intimidating box into your most helpful kitchen assistant. Forget the complex recipe books for now; we’re going back to basics, empowering you to confidently embark on your food processor journey.
Getting Started: Unboxing, Assembling, and Essential Safety
Okay, let’s pull that shiny new food processor out of its box. The first step in learning how to use a food processor for beginners is always understanding its components and prioritizing safety. Don’t worry, it’s simpler than it looks!
Familiarize Yourself with the Parts
Most food processors, regardless of brand or size, come with a few core components:
- The Base: This is the heavy part that houses the motor. Always make sure it’s sitting on a stable, dry surface.
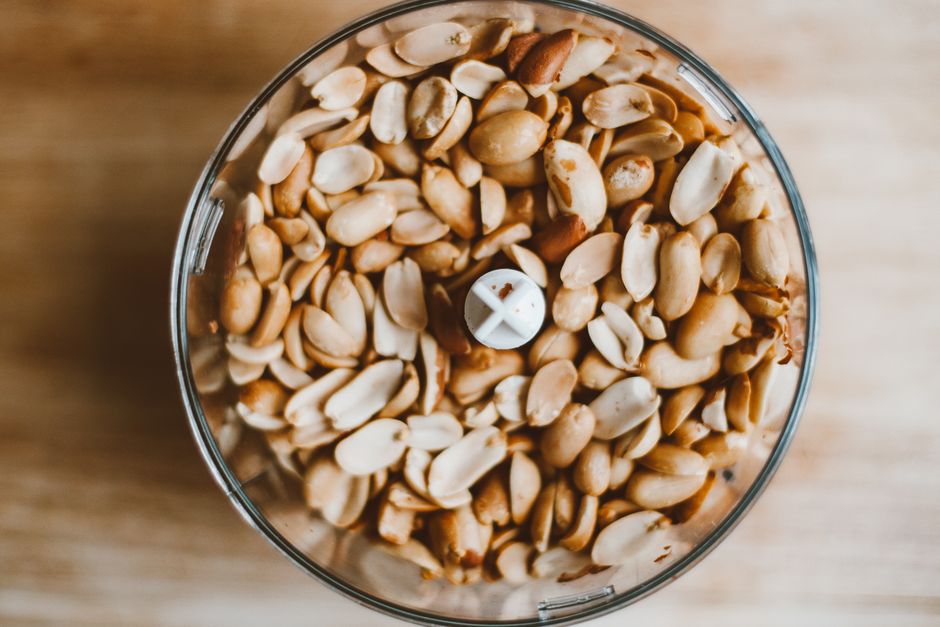
- The Work Bowl: This clear bowl attaches to the base and holds your ingredients.
- The Lid: This fits securely over the work bowl and usually has a feed tube. Many food processors won’t operate unless the lid is properly locked into place—a crucial safety feature.
- The Pusher: This fits into the feed tube and is used to push ingredients down towards the blades. Never use your hands or other utensils when the machine is running!
- Blades and Discs: This is where the magic happens! Your food processor likely comes with at least two main attachments:
- The S-Blade (or Chopping Blade): This is your workhorse. It’s an S-shaped blade that sits at the bottom of the work bowl. It’s perfect for chopping, mincing, pureeing, and mixing. For most chopping and pureeing, you’ll be using this standard S-blade.
- The Dough Blade (or Plastic Blade): If your model comes with one, this plastic blade is designed for kneading dough without overworking it.
- Shredding/Slicing Discs: These are flat discs that sit on a spindle at the top of the work bowl, just under the lid. They’re used for uniformly shredding cheese or vegetables, or thinly slicing ingredients.
Assembly 101: A Step-by-Step Guide
- Place the Base: Ensure your food processor base is on a stable, flat counter.
- Attach the Work Bowl: Twist the work bowl onto the base until it locks securely. There’s usually a clear indicator or click.
- Insert the Blade: Carefully (those S-blades are sharp!) place the S-blade onto the spindle inside the work bowl. It should sit firmly. If you’re using a disc, place the spindle first, then the disc.
- Add Ingredients: Now you can add your ingredients to the work bowl. We’ll dive into how to prepare them in a moment.
- Secure the Lid: Place the lid onto the work bowl and twist it until it locks. Again, listen for the click or align the arrows. Your food processor won’t start if the lid isn’t locked.
- Insert the Pusher: If you’ll be adding ingredients through the feed tube while the machine is running (e.g., for continuous slicing), place the pusher in the feed tube.
Safety First, Always!
This is paramount when learning how to use a food processor for beginners. These machines are powerful, and their blades are extremely sharp.

- Always unplug the food processor before assembling, disassembling, cleaning, or reaching into the bowl.
- Never use your hands or fingers to push food into the feed tube or to dislodge food from the blade. Always use the provided pusher.
- Ensure all parts are properly locked before turning on the appliance.
- Keep children and pets away from the appliance when it’s in use.
- Avoid overfilling the work bowl. There’s usually a max fill line.
- Do not process extremely hot liquids. Steam pressure can build up and cause the lid to detach, creating a dangerous situation.
Mastering Basic Functions: Chop, Mince, Puree, and Mix
Now that you’re familiar with the parts and safety, let’s get to the fun part: using your new appliance! The most common uses for a food processor, especially for beginners, revolve around chopping, mincing, puréeing, and mixing. These are incredibly simple with the standard S-blade.
The Magic of the Pulse Button
For most of these tasks, your best friend will be the pulse button. Unlike a continuous “on” setting, pulsing gives you short bursts of power, allowing you maximum control over the texture of your ingredients. Think of it like a quick on-off switch.
- Short Pulses (1-2 seconds): For coarse chopping.
- Medium Pulses (2-3 seconds): For finer chopping or mincing.
- Longer Pulses (3-5 seconds): For beginning to puree or emulsify.
- Continuous On: Use sparingly, mainly for very smooth purees or continuous mixing.
Chopping and Mincing: Your Everyday Heroes
This is where the food processor truly shines for beginners, saving you immense time and effort compared to hand-chopping.

Example 1: Chopping Onions and Garlic
- Peel and quarter a medium onion. Peel a few cloves of garlic.
- Place them in the work bowl with the S-blade.
- Secure the lid.
- Use short, quick pulse bursts. After 2-3 pulses, check the texture. You’ll see the onion breaking down.
- Continue pulsing, stopping and checking frequently, until you reach your desired consistency – from coarsely chopped to finely minced. Be careful not to over-process, or you’ll end up with onion puree!
This method works beautifully for carrots (cut into 1-inch pieces), celery, bell peppers, herbs like parsley or cilantro (stalks removed), and nuts. For herbs, ensure they are dry, or they might clump. A good trick for perfect herb chopping is to add a tablespoon of flour to absorb moisture.
Pureeing: Smooth Textures in a Flash
Pureeing transforms solid ingredients into a smooth paste or liquid. This is perfect for sauces, dips, and baby food.
Example 2: Making Basic Hummus
- Drain and rinse a can of chickpeas.
- Place the chickpeas, a clove of garlic, 1/4 cup tahini, 2 tablespoons lemon juice, and a pinch of salt into the work bowl with the S-blade.
- Secure the lid.
- Start with several long pulse bursts to break down the chickpeas.
- Then switch to the “continuous on” setting. Drizzle in 2-4 tablespoons of cold water or olive oil through the feed tube while the machine is running, until the hummus reaches your desired creamy consistency.
- Process until completely smooth, scraping down the sides of the bowl as needed.
Other great purees for beginners include fruit sauces, vegetable soups (after cooking the vegetables), and various dips. The key here is patience; sometimes it takes a few minutes and some liquid to achieve a truly smooth texture.
The beauty of learning how to use a food processor for beginners is realizing how quickly these basic tasks become second nature, freeing up your time for more complex culinary adventures. For more detailed insights into specific food processor techniques, you might find this Wikipedia article on food processors quite helpful.
Beyond the Basics: Shredding, Slicing, and Dough
Once you’re comfortable with chopping and pureeing, it’s time to explore some of the other fantastic capabilities of your food processor. Many models come with additional discs for shredding and slicing, and a dedicated blade for kneading dough.
Shredding and Slicing Discs: Uniformity Made Easy
These discs are a huge time-saver for meal prep, salads, and baking. They attach to a central spindle in the work bowl, sitting just under the lid. They typically come in different thicknesses (e.g., thin slice, thick slice, fine shred, coarse shred). Always refer to your manual to see which discs came with your model and how to attach them.
How to Use Them:
- Attach the appropriate shredding or slicing disc to the spindle in the work bowl.
- Secure the lid.
- Ensure your ingredients are properly prepared: for shredding cheese, use cold, firm blocks. For vegetables like carrots, potatoes, or cucumbers, cut them to fit easily into the feed tube.
- Turn the food processor to the “on” setting (continuous).
- Feed the ingredients through the feed tube using the pusher. Apply even, gentle pressure. Let the blade do the work!
Examples:
- Shredded Cheese: Say goodbye to pre-bagged, anti-caking agent-laden shredded cheese! A block of cheddar can be shredded in seconds for tacos, casseroles, or gratins.
- Coleslaw: Shred cabbage and carrots effortlessly for fresh, vibrant coleslaw.
- Cucumber or Potato Slices: Achieve perfectly uniform slices for salads, gratins, or homemade potato chips.
Kneading Dough with the Dough Blade
If your food processor came with a plastic dough blade, you’re in luck! It can handle various doughs, from pizza to pie crust to bread. The dough blade is designed to mix and knead without developing too much gluten, which can make dough tough.
Example: Basic Pizza Dough
- Attach the plastic dough blade to the spindle in the work bowl.
- Add dry ingredients first (flour, salt, yeast, sugar if using). Pulse a few times to combine.
- With the machine running on “on,” slowly pour warm water (mixed with a little olive oil, if your recipe calls for it) through the feed tube.
- Watch as the dough comes together, forming a ball and cleaning the sides of the bowl. Stop processing once a smooth ball forms, usually within 30-60 seconds. Over-kneading can result in tough dough.
- Remove the dough, form it into a ball, and let it rise according to your recipe.
This is an excellent way to introduce yourself to bread making without the physical effort of hand-kneading. Learning how to use a food processor for beginners means discovering these surprising shortcuts!
Essential Tips for Food Processor Success
To truly get the most out of your food processor, even as a beginner, keep these expert tips in mind. They’ll help you achieve better results, prolong the life of your appliance, and ensure a smooth cooking experience.
Ingredient Preparation is Key
- Cut to Size: For even processing, cut larger ingredients into uniform pieces (e.g., 1-inch chunks for vegetables you’re chopping). This ensures everything gets processed evenly.
- Don’t Overload: Respect the “max fill” line on your work bowl. Overloading can strain the motor, lead to uneven processing, or even cause ingredients to spill out. If you have a large batch, work in smaller portions.
- Dry Ingredients First (Sometimes): When mixing wet and dry ingredients, often it’s best to add dry ingredients first, pulse to combine, then gradually add wet ingredients through the feed tube while the machine is running.
- Keep it Cold (for some tasks): When shredding cheese, make sure it’s cold and firm. This prevents it from clumping and ensures clean shreds.
Technique Makes a Difference
- Pulse, Don’t Process Continuously (for chopping): As mentioned, the pulse button is your best friend. It gives you control. Continuous processing for chopping often leads to uneven textures or pureeing before you want it.
- Scrape Down the Sides: Especially when pureeing or mixing, ingredients can stick to the sides of the bowl. Periodically stop the machine, unplug it, and use a spatula to scrape down the sides to ensure even processing.
- Know When to Stop: It’s better to under-process and pulse a few more times than to over-process. Once something is pureed, there’s no going back to chunks!
Cleaning and Maintenance: Keep It Kitchibly Clean!
Cleaning your food processor properly ensures hygiene and longevity.
- Unplug First! Always unplug the unit before attempting to clean it.
- Hand Wash Blades: The S-blade and other sharp discs should generally be hand-washed with care. Use a brush to clean around the sharp edges, and handle them carefully to avoid cuts.
- Dishwasher Safe Parts: Most work bowls, lids, and pushers are dishwasher safe (top rack recommended). Check your specific model’s manual.
- Wipe the Base: The motor base should be wiped clean with a damp cloth. Never immerse the base in water.
- Storage: Store blades safely, preferably in their original packaging or a designated storage container, to prevent accidents.
What’s the difference between a food processor and a blender?
While both blend, they have different strengths. A blender excels at liquid-heavy tasks like smoothies, soups, and pureeing sauces, creating very smooth textures. A food processor, on the other hand, is designed for processing solids: chopping, mincing, shredding, slicing, and kneading dough. It has a wider work bowl and various blades/discs for versatility, whereas a blender has a taller, narrower pitcher and typically just one blade for liquid-focused tasks. Knowing the distinction helps you pick the right tool for the job.
Can I put hot liquids in a food processor?
It’s generally not recommended to put very hot liquids (like boiling soup) directly into a food processor. Hot liquids can create steam pressure, potentially causing the lid to pop off, leading to a mess or burns. If you need to process hot ingredients, let them cool down first, or process them in smaller batches with the feed tube opened slightly (and covered with a kitchen towel) to allow steam to escape. Blenders are often better suited for hot liquids, but even then, caution is advised.
How do I clean my food processor?
Cleaning is straightforward but requires care. Always unplug the unit before disassembling. The work bowl, lid, and pusher are typically dishwasher-safe (top rack). The blades and discs, however, should be hand-washed carefully with soapy water and a brush to avoid cuts. Never immerse the motor base in water; simply wipe it clean with a damp cloth. Regular cleaning after each use prevents food from drying onto parts, making cleanup much easier.
What size food processor do I need?
Food processors come in various sizes, typically measured by the capacity of their work bowl (e.g., 3-cup, 7-cup, 12-cup). For beginners or single individuals/couples, a 7-cup model is often a versatile choice. For larger families or those who frequently entertain or batch cook, a 10- to 14-cup model is more suitable. Mini food processors (3-5 cup) are great for small tasks like chopping garlic or nuts, but less versatile for larger recipes or doughs. Consider your typical batch sizes before buying.
What are some beginner-friendly recipes to try?
Once you’re comfortable with the basics, try these simple recipes: a quick salsa (chopped tomatoes, onions, cilantro, jalapeño), homemade pesto (basil, pine nuts, Parmesan, garlic, olive oil), creamy hummus, or a simple pie crust. You can also use it for shredding carrots for a carrot cake or making a basic chicken salad. The key is to start with recipes that require basic chopping and pureeing to build your confidence using your new food processor.
My Final Verdict
Diving into the world of food processors can feel daunting at first, but I hope this guide has illuminated just how accessible and incredibly useful these kitchen workhorses are. From that initial “what even is this thing?” moment to confidently whipping up a batch of hummus or perfectly shredded cheese, the journey of learning how to use a food processor for beginners is one of true kitchen empowerment. You’ll quickly find that this appliance saves you precious time, reduces effort, and opens up a whole new realm of culinary possibilities. It’s not just about speed; it’s about consistency, precision, and making once-laborious tasks a breeze.
Don’t be afraid to experiment, start simple, and remember the invaluable pulse button. Your food processor is designed to be a helpful assistant, not a scary gadget. Embrace the journey, and soon you’ll wonder how you ever managed without it. Happy processing!
For more detailed information on food safety and handling, always consult reliable sources like the FoodSafety.gov website.