

How Long to Cook Frozen Fries in Air Fryer For Perfect Crisp
Unlock the secret to perfectly crispy frozen fries in your air fryer! Learn the exact cooking time and temperature for delicious results every time.
Remember that time your frozen fries came out soggy or burnt in the oven? Yeah, me too. It’s a culinary tragedy, especially when you’re craving that perfectly golden, crispy exterior with a fluffy potato center. For years, my oven baked fries were a mixed bag. Some batches were decent, others… well, let’s just say they ended up in the compost bin. Then, I discovered the magic of the air fryer. It’s a game-changer, truly transforming humble frozen fries into a restaurant-worthy side dish. But like any great tool, getting the timing and temperature just right can be tricky. You don’t want undercooked, limp potatoes, nor do you want charcoal briquettes. So, let’s fix that and dive into the art of perfectly cooked frozen fries in your air fryer.

The Golden Rule: Temperature and Time
When it comes to cooking frozen fries in an air fryer, there’s a sweet spot for temperature and time that consistently delivers fantastic results. Based on my extensive testing (and a few less-than-perfect batches, I’ll admit!), the consensus leans towards a **high heat, relatively short cooking time**. Most experts and home cooks agree that air frying frozen fries at **400°F (200°C)** is the way to go. This high heat is crucial for mimicking the deep-frying effect that creates that coveted crispness without actually submerging the fries in oil.
Now, for the time. This is where it gets a little nuanced, as different brands and thicknesses of fries will require slightly different durations. However, a good starting point is usually around **15 to 20 minutes total cooking time**. This isn’t a set-it-and-forget-it situation, though. The key to maximum crispiness lies in the **shake**. You absolutely must shake the air fryer basket halfway through the cooking process, and sometimes even a bit more often. This ensures that all sides of the fries get exposed to the hot air circulation, preventing them from sticking together and guaranteeing even cooking.
I’ve found that many frozen fries, especially standard cut ones, do exceptionally well with a 10-minute initial cook, followed by a thorough shake, and then another 8-10 minutes. Thicker cut fries, like steak fries, might need a bit longer, potentially pushing towards the 20-25 minute mark. It’s always best to check them around the 15-minute mark and adjust as needed. Remember, your air fryer is a powerful appliance, and it’s better to check a little early than to overcook!
Prepping Your Frozen Fries for Air Frying Success
Before we even get to the air fryer, a little prep can go a long way. While you can technically just dump the frozen fries straight from the bag into the basket, a couple of simple steps can elevate your fries from good to *great*. First, resist the urge to thaw them. The cold, icy exterior actually helps create steam during the initial cooking phase, which can lead to crispier fries as the ice evaporates and the surface dries out.
The most important step here, and one that many people overlook, is **avoiding overcrowding the air fryer basket**. This is a cardinal sin in air fryer cooking, and with fries, it’s particularly detrimental. If you pack the basket too full, the hot air won’t be able to circulate effectively around each fry. This leads to steaming rather than crisping, and you’ll end up with a basket of limp, sad potatoes. Trust me, I’ve been there. It’s far better to cook in batches. For a standard-sized air fryer, I usually aim to fill the basket no more than two-thirds full for optimal results. If you have a large family or are making a big batch, you’ll definitely need to do two or even three batches. This is where that delicious, crispy texture truly shines.
Some recipes suggest tossing the fries with a tiny bit of oil. While air fryers use significantly less oil than traditional frying, a light coating of **high-smoke-point oil**, like avocado or canola oil, can further enhance crispiness and flavor. Just a tablespoon or two for a standard bag of fries is usually enough. You can add this oil to the fries in a bowl *before* placing them in the air fryer basket. Ensure they’re lightly coated, not drenched. This step is optional, but in my experience, it does make a noticeable difference. You can also add your favorite seasonings at this stage – salt, pepper, garlic powder, paprika, or even a sprinkle of cayenne for a little kick!
The Step-by-Step Guide to Crispy Air Fryer Fries
Alright, you’ve got your air fryer ready, your fries are (mostly) prepped, and you’re armed with the knowledge of the perfect temperature. Let’s get cooking! Follow these steps for consistently delicious results:
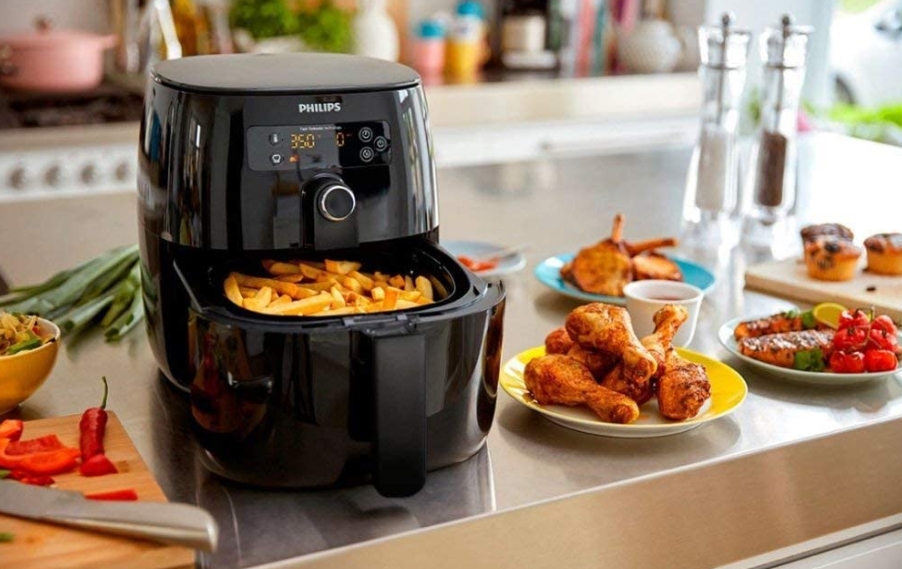
- Preheat Your Air Fryer: Just like with an oven, preheating is key. Set your air fryer to 400°F (200°C) and let it run for about 3-5 minutes to get nice and hot. This initial heat burst helps kickstart the crisping process.
- Add the Fries: Carefully place your frozen fries in a single layer as much as possible in the air fryer basket. Remember, do not overcrowd the basket. If necessary, cook in batches. If you’re using a bit of oil and seasonings, toss them together in a bowl before adding them to the basket.
- First Cook: Place the basket in the air fryer and set the timer for 8-10 minutes. This initial cooking period starts to soften the fries and begin the browning process.
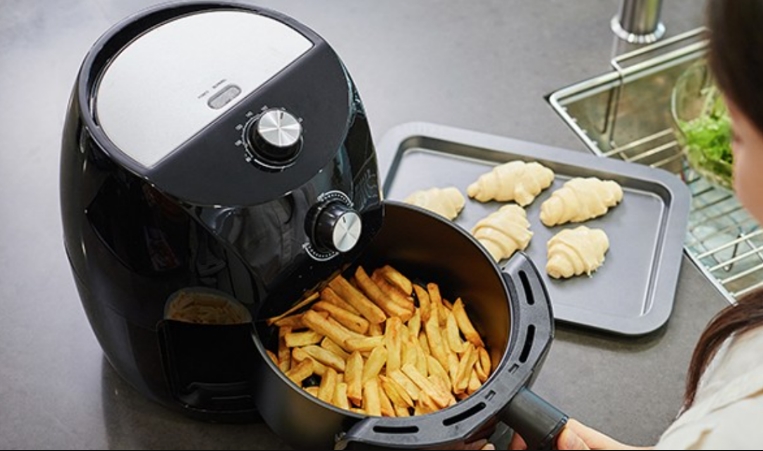
- The Crucial Shake: This is the most important step! At the 8-10 minute mark, carefully remove the air fryer basket and give it a **vigorous shake**. Toss the fries around to ensure all sides are exposed to the hot air. You can even manually flip some of the larger ones if you’re feeling particularly meticulous.
- Second Cook: Return the basket to the air fryer and set the timer for another 8-10 minutes. This second phase is where the magic happens, developing that golden-brown crispiness.
- Check for Doneness: After the second cooking period, check your fries. Are they golden and crispy? If they’re looking good, they’re done! If they’re still looking a bit pale or soft for your liking, continue cooking in 2-3 minute increments, checking each time. The total time will vary depending on your air fryer model, the thickness of the fries, and how full your basket is.
- Serve Immediately: Air fryer fries are best enjoyed fresh off the heat! Serve them alongside your favorite dipping sauce and enjoy your perfectly crispy creation.
This step-by-step process has been my reliable guide for getting those perfect air fryer frozen french fries every single time. It’s a simple method that yields impressive results.
Troubleshooting Common Air Fryer Fry Challenges
Even with the best instructions, sometimes things don’t go exactly as planned. Don’t worry, I’ve encountered my fair share of air fryer mishaps, and I’m here to help you troubleshoot!
The Problem: My fries are soggy and not crispy.
- Reason: Overcrowding the basket. This is the most common culprit. Hot air needs to circulate freely. If the fries are piled too high, they’ll steam instead of crisp.
- Solution: Cook in smaller batches. It’s always better to do two batches and have them perfectly crispy than one giant batch that’s a disappointment.
- Reason: Not shaking the basket enough. The fries need to be tossed to ensure even cooking and crisping on all sides.
- Solution: Shake, shake, shake! Make sure you really give the basket a good, thorough shake halfway through.
- Reason: Not hot enough. If your air fryer isn’t properly preheated or the temperature is too low, it won’t achieve the necessary crisping effect.
- Solution: Ensure proper preheating and stick to 400°F (200°C).
The Problem: My fries are burnt on the outside and undercooked on the inside.
- Reason: Temperature set too high, or cooking for too long without checking. While high heat is good, too much of it can scorch the outside before the inside is cooked.
- Solution: Reduce the temperature slightly (to maybe 380°F/190°C) or shorten the cooking time for the second phase. Always check your fries diligently, especially during that last portion of cooking.
- Reason: Uneven thickness of fries. If you have a mix of very thin and very thick fries, the thin ones will burn before the thick ones are done.
- Solution: Try to use fries of similar thickness. If you can’t, remove the thinner, crispy fries early and let the thicker ones cook a bit longer.
The Problem: My fries are sticking to the basket.
- Reason: Not using any oil (for some brands) or a sticky coating on the fries. Some brands of frozen fries have coatings that can be more prone to sticking.
- Solution: A light spray of cooking oil before air frying can prevent sticking. Alternatively, try a quick toss with a tablespoon of oil in a bowl beforehand. Ensure your air fryer basket is clean from previous cooking residue.
Don’t get discouraged! Troubleshooting is part of the learning process. With a few adjustments, you’ll be making perfect air fryer fries in no time. It’s all about understanding how your specific appliance and fries behave.
Choosing the Right Frozen Fries for Your Air Fryer
Not all frozen fries are created equal, and this can also impact your cooking time and results in the air fryer. Let’s talk about a few common types:
- Shoestring/Eiffel Tower Fries: These are the classic, thin fries. They cook the fastest and get incredibly crispy. Because they are so thin, keep a close eye on them towards the end of the cooking time, as they can go from golden to burnt very quickly. They are fantastic for air frying and often require slightly less time than thicker cuts, usually around 12-15 minutes total.
- Crinkle Cut Fries: The ridges on these fries are great for holding dipping sauces, and they tend to crisp up beautifully. Their cooking time is usually similar to standard cut fries, falling into the 15-20 minute range at 400°F (200°C).
- Steak Fries/Wedges: These are the thickest of the bunch. Due to their size, they will require a longer cooking time. You might need to air fry them for 20-25 minutes, and it’s even more crucial to ensure you don’t overcrowd the basket with these. A longer initial cook time might also be beneficial.
- Seasoned Fries: Many brands come pre-seasoned. These are generally fine to air fry as is. However, if you plan to add extra seasonings, be mindful of the existing salt content so you don’t end up with overly salty fries. I find them to be just as easy to air fry as plain ones.
- Sweet Potato Fries: These are a bit different. While they can be air fried, they often benefit from a slightly lower temperature, perhaps 375°F (190°C), and a longer cooking time to ensure they cook through without burning. They can also be a bit softer and less uniformly crispy than regular potato fries.
Ultimately, the best frozen fries for your air fryer are the ones you enjoy the most! Just be prepared to adjust your cooking times slightly based on the thickness and cut. Always refer to the packaging for general cooking instructions, but use them as a guideline rather than a strict rule when using an air fryer.
Frequently Asked Questions
Do I need to preheat my air fryer for frozen fries?
Yes, preheating your air fryer to 400°F (200°C) for about 3-5 minutes is highly recommended. It ensures the fries start cooking immediately and efficiently, leading to crispier results. It’s like giving them a hot start!
Can I add oil to frozen fries before air frying?
Absolutely! While not strictly necessary, a light toss with about a tablespoon of high-smoke-point oil (like avocado or canola oil) can enhance crispiness and prevent sticking. You can add seasonings at this stage too.
How many servings can I realistically cook at once?
This depends entirely on the size of your air fryer basket. For optimal crispiness and even cooking, aim to fill the basket no more than two-thirds full. For standard-sized air fryers (around 3-5 quarts), this usually means cooking about 1-2 servings at a time. Larger air fryers can accommodate more.
How do I know when my frozen fries are “done”?
Look for a golden-brown color and a crisp texture. They should sound crispy when you tap them. If they’re limp and pale, they need more time. If they’re dark brown, they’re likely overcooked. Trust your eyes and your taste buds!
Can I use frozen fries that have been partially cooked from a previous attempt?
It’s generally not recommended to re-freeze and re-cook fries that have already been partially cooked and cooled. For best results and food safety, cook them once from frozen as intended.
My Final Verdict
Mastering the art of cooking frozen fries in an air fryer is surprisingly simple, and the payoff is immense. Gone are the days of disappointing, soggy oven fries. With a consistent temperature of 400°F (200°C), a total cooking time of around 15-20 minutes, and most importantly, regular shaking of the basket, you can consistently achieve perfectly crispy, golden-brown fries. Remember to avoid overcrowding – this is the single most important rule for air fryer success. Whether you opt for shoestring, crinkle-cut, or steak fries, a little attention to detail will transform them into a delicious side dish that will have everyone asking for your secret. Air frying truly is one of the best ways to get that satisfying crunch at home, making it a staple in my own kitchen for quick and easy meals or party snacks. For more great tips on maximizing your kitchen gadgets, check out our guide on best air fryer recipes and learn how to make frozen chicken wings in air fryer.
For those interested in the science behind crispy food, understanding the Maillard reaction, which contributes to browning and flavor, is fascinating. You can learn more about this on Wikipedia. And for general food safety guidelines, the U.S. Department of Agriculture (USDA) offers excellent resources.